So, you want to get into photography? That’s great! Photography is a wonderful hobby that can be very rewarding. But where do you start?
There’s a lot to learn in photography, and it can be overwhelming at first.
But don’t worry, we’re here to help. In this article, we’ll give you some tips on how to get started with photography.
Here are 20 tips on how to get started with photography:
1. Start by doing your research
2. Find a good camera
3. Get to know your camera
4. Understand the basics of photography
5. Start practicing
6. Find your style
7. Edit your photos
8. Share your photos
9. Join a community or group
10. Explore different genres of photography
11. Take classes or workshops
12. Enter contests and challenges
13. Go on photo adventures and trips
14. Collaborate with other photographers
15. Second shoot for another photographer
16. Print your photos
17. Protect your photos and backups
18. Display your photos
19. Sell your photos
20. Teach others about photography
1. Start By Doing Your Research
If you’re serious about getting into photography, then you need to do your research.
There are lots of resources out there on the internet, in libraries, and in bookstores.
You need to learn about the different types of cameras, lenses, and other equipment.
You also need to learn the basics of photography, such as composition and lighting. And you need to find out what kind of style you want to pursue.
2. Find A Good Camera
The first step in getting started with photography is finding a good camera.
There are lots of different cameras on the market, and it can be overwhelming trying to figure out which one is right for you. But don’t worry, we’re here to help.
3. Get To Know Your Camera
Once you have a camera, it’s important to get to know it. Read the manual, and experiment with all the different features and settings.
The more you know about your camera, the better your photos will be.
4. Understand The Basics Of Photography
If you want to take great photos, you need to understand the basics of photography. This includes things like composition, lighting, and exposure.
There are lots of resources out there that can teach you these things. You can find books, online tutorials, and even classes or workshops.
5. Start Practicing
The best way to improve your photography is to practice as much as possible.
Take lots of photos, and experiment with different techniques. The more you practice, the better your photos will be.
6. Find Your Style
As you start practicing and experimenting, you’ll begin to develop your own unique style.
This is what makes your photos stand out from everyone else’s. It’s important to find a style that you’re comfortable with and that you enjoy shooting.
7. Edit Your Photos
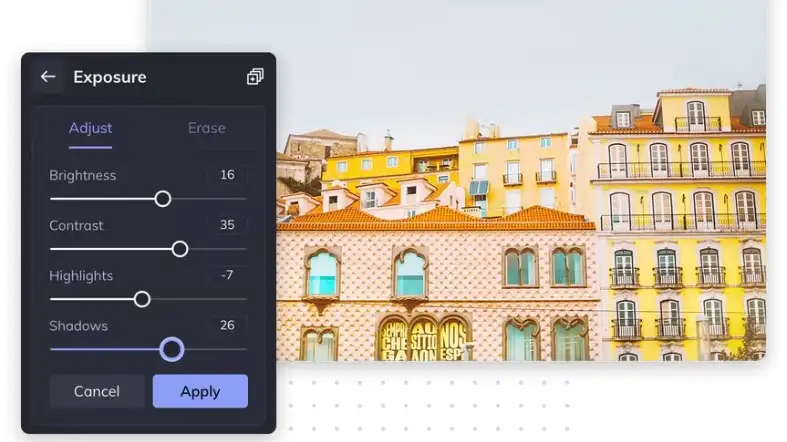
Once you’ve taken some great photos, it’s time to edit them. Editing can help you bring out the best in your photos, and make them look even better.
There are lots of different software programs out there that you can use for editings, such as Adobe Photoshop or Lightroom.
8. Share Your Photos
Once you’ve taken and edited some great photos, it’s time to share them with the world!
There are lots of different ways to do this. You can post them on social media, enter them into contests or challenges, submit them to magazines or websites, or even sell them as prints.
9. Join A Community Or Group
One of the best ways to improve your photography is to join a community or group. There are lots of different groups out there, both online and offline.
This can be a great way to meet other photographers, learn from each other, and get feedback on your photos.
10. Explore Different Genres Of Photography
There are lots of different genres of photography, such as landscape, portrait, street, and wildlife.
Explore different genres and find the one that you like best. And don’t be afraid to experiment with other genres as well.
11. Take Classes Or Workshops
If you want to improve your photography skills, taking a class or workshop can be a great idea.
There are lots of different classes and workshops out there, both online and offline.
You can learn about different topics, such as composition, lighting, and post-processing.
12. Enter Contests And Challenges
Entering contests and challenges is a great way to push yourself creatively, and it’s also a lot of fun.
There are lots of different contests and challenges out there, so you’re sure to find one that’s right for you.
And even if you don’t win, you’ll still learn a lot and get some great practice.
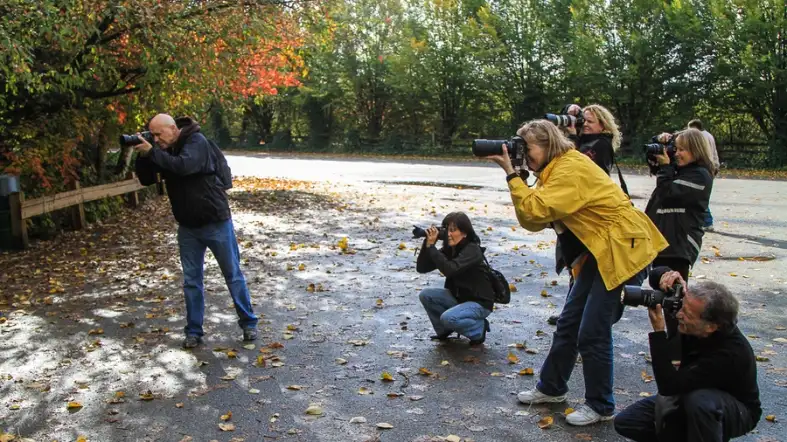
13. Go On Photography Trips
One of the best ways to improve your photography is to go on photography trips.
This is a great way to practice your skills, and also to see new places and meet new people.
There are lots of different companies that offer photography tours and workshops, so you’re sure to find one that’s right for you.
14. Collaborate With Other Photographers
Collaborating with other photographers is a great way to improve your skills and also to have some fun.
There are lots of different ways to collaborate, such as shooting photo projects together or even just going on photography trips together.
15. Second Shoot For Another Photographer
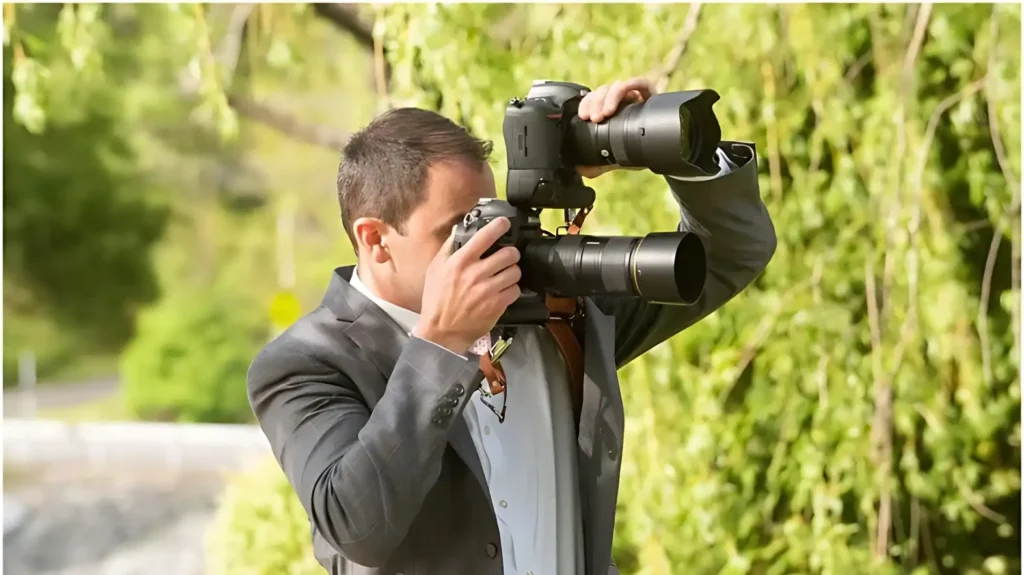
Second shooting for another photographer is a great way to get experience, and also to learn from someone who is more experienced than you.
This is a great way to build your portfolio and to get some practice with different types of photography.
16. Print Your Photos
Printing your photos is a great way to see them in a different light, and also to show them off to friends and family.
You can print them at home, or you can send them to a professional printer.
17. Protect Your Photos And Backups
It’s important to protect your photos and backups, so that you don’t lose them.
There are lots of different ways to do this, such as backing up your photos to a cloud service, or using an external hard drive.
18. Display Your Photos
Displaying your photos is a great way to show them off, and to make them part of your everyday life.
There are lots of different ways to display your photos, such as hanging them on your walls, or putting them in photo frames.
19. Sell Your Photos
Selling your photos is a great way to make some extra money, and also to get your name out there.
There are lots of different ways to sell your photos, such as through stock photography websites, or by setting up your own website.
20. Teach Others About Photography
Teaching others about photography is a great way to share your knowledge, and also to help others improve their skills.
There are lots of different ways to teach others, such as through classes or workshops, or by writing articles or books.
What Are The Basic Parts Of A Camera?
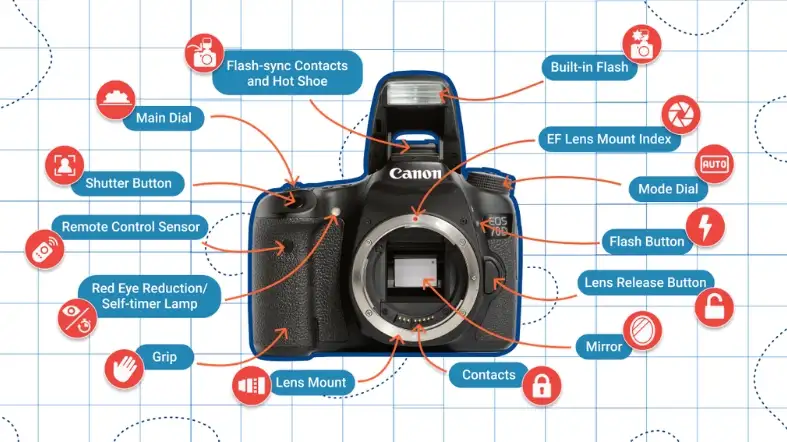
The basic parts of a camera are the lens, the shutter, the film or image sensor, the viewfinder, and the body.
The lens focuses light from the scene onto the film or image sensor. The shutter opens and closes to expose the film or image sensor to light.
The viewfinder allows you to see what the camera will capture. The body houses all of these components and provides a place to grip the camera.
What Is Aperture?
Aperture is a measure of how much light your camera lets in when you take a photo. It is expressed as an f-stop number, such as f/2.8 or f/5.6.
A lower f-stop number means a wider aperture, which lets in more light. A higher f-stop number means a narrower aperture, which lets in less light.
What Is Shutter Speed?
Shutter speed is the amount of time that your camera’s shutter is open when you take a photo. It is expressed as a fraction of a second, such as 1/250 or 1/60.
A faster shutter speed (a smaller fraction) means less time for light to reach the film or image sensor, so it can be used for action shots or in low-light situations.
A slower shutter speed (a larger fraction) means more time for light to reach the film or image sensor, so it can be used for stationary subjects or when you want to capture the feeling of movement.
What Is ISO?
ISO is a measure of your camera’s sensitivity to light. A low ISO (100 or 200) means that your camera is not very sensitive to light and will require more light to produce a properly exposed photo.
A high ISO (800, 1600, or 3200) means that your camera is very sensitive to light and will require less light to produce a properly exposed photo.
Higher ISOs are often used in low-light situations or when you want to capture fast-moving action. However, using a high ISO can also introduce noise into your photos.
Now that you know the basics of photography, get out there and start taking some great pictures!
What Are The Different Modes Of A Camera?
There are few different modes of a camera.
1. Automatic Mode:
Automatic mode is the most basic mode and is great for those who are just starting out with photography.
The camera will choose the shutter speed, aperture, and ISO for you. All you need to do is point and shoot.
2. Portrait Mode:
Portrait mode is designed for taking photos of people. The camera will use a large aperture to keep the background blurry and the focus on the subject.
3. Landscape Mode:
Landscape mode is perfect for taking photos of scenery. The camera will use a small aperture to keep everything in focus.
This is especially important when there are objects close to the camera and far away from the camera.
4. Close-Up Mode:
Close-up mode is ideal for taking photos of small objects. The camera will use a large aperture to get a shallow depth of field.
This means that the background will be blurry and the focus will be on the subject.
5. Sports Mode:
Sports mode is great for taking photos of fast-moving subjects. The camera will use a fast shutter speed to freeze the action.
This is especially important when there is low light or you are trying to capture a sense of movement.
6. Night Mode:
Night mode is perfect for taking photos in low-light situations.
The camera will use a slow shutter speed and a high ISO to get the best possible image. This is especially important when there is no other light source available.
7. HDR Mode:
HDR mode is designed for taking photos with a lot of contrast. The camera will take multiple photos at different exposures and then combine them into one photo.
This is especially useful when you are trying to capture both the highlights and shadows of a scene.
8. Panorama Mode:
Panorama mode stitches together multiple photos to create one wide photo.
This is great for landscapes or cityscapes. The camera will automatically take several photos and then stitch them together.
9. Macro Mode:
Macro mode is perfect for taking close-up photos of small objects.
The camera will use a large aperture to get a shallow depth of field. This means that the background will be blurry and the focus will be on the subject.
10. Aperture Priority Mode:
Aperture priority mode gives you control over the aperture while the camera chooses the shutter speed and ISO.
This is great for those who want more control over their photos. You can choose a large or small aperture depending on the look you want to achieve.
How Long Does It Take For Someone To Learn Photography?
This is a difficult question to answer, as it depends on the person’s natural ability, level of interest and commitment.
However, Photography is not an easy skill to learn, and it generally takes years of practice to become a proficient photographer.
There are many different aspects to photography, from technical skills such as exposure and focus, to creative composition and post-processing.
It can take a lifetime to master all of these different aspects, but the good news is that anyone can get started with photography and begin learning the basics relatively quickly.
How To Take A Photo That People Will Want To Share (Step By Step)
1. Find An Interesting Subject
Your first step is to find an interesting subject to photograph. This could be anything from a person or animal, to a landscape or piece of architecture.
If you’re struggling to find something interesting to take a photo of, try thinking outside the box.
2. Get Up Close And Personal
One of the best ways to make your photos more shareable is to get up close and personal with your subject.
This could mean getting down on the ground to take a photo of a pet, or walking around until you find the perfect angle for a landscape shot.
3. Use Natural Light
Whenever possible, try to use natural light when taking photos. This will help to make your photos look more natural and appealing.
If you’re indoors, try to position yourself near a window so that you can take advantage of the natural light coming in.
4. Edit Your Photos
Once you’ve taken your photos, it’s time to edit them.
This doesn’t mean that you should go overboard with the editing, but a few simple tweaks can make a big difference.
For example, you might want to adjust the contrast or brightness levels, or add a filter to give your photos a unique look.
5. Share Your Photos
Once you’re happy with your edited photos, it’s time to share them with the world!
There are lots of different ways to do this, but some of the most popular options include uploading them to social media sites like Facebook and Instagram, or sending them via email or text message.
How To Take A Professional Photo? 10 Easy Steps
There are a few things to keep in mind when taking a professional photo:
1. Use a tripod. This will help keep the camera steady and prevent blurriness.
2. Use a remote shutter release. This will allow you to take the photo without touching the camera, preventing camera shake.
3. Use a low ISO setting. This will help prevent noise in the photo.
4. Use a fast shutter speed. This will help freeze any movement in the photo.
5. Use a large aperture setting. This will create a shallow depth of field, making the subject stand out from the background.
6. Use appropriate lighting. Make sure the lighting is not too harsh or too dim. natural light is often best.
7 . Choose the right composition . Make sure the subject is in the center of the frame and there is enough negative space around them.
8 . Edit the photo. Use photo editing software to make any necessary adjustments to the photo.
9 . Save the photo in a high-resolution format. This will ensure that the photo looks good when printed.
10 . Print the photo. Get the photo printed by a professional printer for best results.
How To Take A Photo For Your Business?
There are a few things to consider when taking photos for your business:
- What is the purpose of the photo? Is it for an advertisement, website, social media, etc.?
- Who is your target audience?
- What feeling do you want to convey with the photo?
- What kind of background or setting would be most appropriate?
- What type of pose or composition will work best?
Keep these questions in mind when planning your photo shoot, and you’ll be on your way to taking great photos for your business!
How To Take A Photo For A Blog Or Website?
This is a question that is often asked by bloggers, especially those who are new to the blogging world.
There are a few things to keep in mind when taking photos for your blog.
1. First and foremost, make sure the photo is clear and in focus. Blurry photos are not going to do your blog any favors.
2. Try to take photos that are well lit. Natural light is always best, but if you have to use a flash, make sure it’s not too harsh.
3. When taking close up shots, be sure to focus on the subject matter. This will help ensure that your readers can see what you’re trying to show them.
4. And finally, have fun! Taking photos for your blog should be enjoyable, so don’t stress out about getting everything perfect. Just relax and snap away!
How To Take A Photo For Social Media? Beginners Guide
In today’s world, social media is one of the most powerful tools that we have at our disposal.
It allows us to connect with people all over the world and share our thoughts and experiences with them.
However, one of the things that many people struggle with is how to take a good photo for social media.
If you’re someone who is looking to improve their photography skills or just take better photos for social media, then this guide is for you!
We’ll go over some basic tips and tricks that will help you take better photos for social media.
1. Find The Right Lighting
One of the most important aspects of taking a good photo is finding the right lighting.
If you’re taking a picture inside, try to find a spot near a window where the natural light can come in.
If you’re taking a picture outside, try to avoid direct sunlight as it can be too harsh and make your photo look washed out.
2. Use Filters Sparingly
When it comes to using filters on your photos, less is usually more. Try not to go overboard with the filters as it can make your photos look fake or artificial.
Sometimes, all you need is a simple filter to enhance the colors in your photo.
3. Get Close To Your Subject
Another tip for taking better photos is to get close to your subject matter.
This will help you fill the frame and eliminate any distractions that might be in the background.
When you’re close to your subject, it also allows you to capture more details and textures.
4. Use The Rule Of Thirds
One of the most important composition rules in photography is the rule of thirds.
This rule states that you should imagine your frame being divided into nine equal parts.
Then, place your subject matter along one of those lines or at the intersection of two lines. This will help you create a more balanced and pleasing composition.
5. Edit Your Photos
Once you’ve taken your photo, it’s important to edit it to make sure that it looks its best.
There are a number of different editing apps that you can use on your smartphone or tablet. Just experiment with different apps and find the one that works best for you.
We hope that these tips will help you take better photos for social media.
Just remember to have fun and experiment with different techniques until you find the ones that work best for you!
What Is The Best Time Of Day To Shoot?
There is no definitive answer to this question as the best time of day to shoot will vary depending on the type of photography you are doing and the conditions you are shooting in.
However, there are some general tips that can help you get the most out of your photography no matter what time of day it is.
One of the most important things to keep in mind when deciding when to shoot is the quality of light.
The soft, warm light of sunrise and sunset can be ideal for certain types of photography, while the harsher light of midday may be better for others.
Experiment with different times of day to see which works best for the kind of photos you want to take.
Another factor to consider is the activity level at your shooting location.
If you’re trying to photograph a busy street or a crowded beach, midday is probably going to be your best bet.
However, if you’re looking for a more peaceful setting, early morning or evening may be better.
Consider the time of day when your shooting location will be most active and plan accordingly.
Finally, don’t forget to take your own schedule into account.
If you’re not a morning person, there’s no sense in forcing yourself to get up at dawn just for the sake of getting some good photos.
Shoot when you’re feeling most creative and inspired, and you’ll be sure to get some great shots no matter what time of day it is.
What Is The Best Time Of Year To Shoot?
There really is no definitive answer to this question as the best time to shoot will vary depending on the type of photography you are interested in.
For landscape photography, for example, the best time of year to shoot is typically during the fall when the leaves are changing color.
For portrait photography, however, the best time of year to shoot is often during the spring or summer when there is more natural light available.
How Much Should I Charge For Photography As A Beginner?
This is another difficult question to answer definitively as there are a number of factors that can affect how much you should charge for your services.
Some things to consider include your level of experience, the type of photography you are offering, and the market you are targeting.
In general, however, it is safe to say that you should charge somewhere between $50 and $100 per hour for photography services as a beginner.
What Is The Best Time Of Day To Shoot For Portraits?
There is no definitive answer to this question as the best time of day to shoot for portraits will vary depending on the lighting conditions and the type of portrait you are hoping to achieve.
However, generally speaking, the best time of day to shoot for portraits is either early in the morning or late in the afternoon when the light is softer and more flattering.
If you are shooting outdoors, avoid direct midday sun as it can create harsh shadows and make your subjects squint.
If you are shooting indoors, try to position your subjects near a window for natural light or use artificial lighting such as studio lights or flashlights.
Experiment with different lighting setups until you find one that works best for your particular scene.
And remember, even if the lighting isn’t perfect, you can always edit your photos later to adjust the brightness and contrast.
How To Take A Step Back And Get Your Camera Ready For The Best Photos (10 Easy Steps)
When you’re taking photos, it’s important to take a step back and get your camera ready for the best photos. Here are some tips on how to do this:
1. Get A Tripod:
A tripod will help you keep your camera steady and avoid blurry photos. There are a lot of different types of tripods, so find one that suits your needs.
2. Use A Remote Shutter Release:
A remote shutter release will let you take photos without touching your camera, which can cause blur.
3. Set Up Your Camera Before You Start Shooting:
Make sure your camera is in the right mode and the right settings before you start taking photos. This will help you avoid having to fiddle with your camera mid-shoot.
4. Take Test Shots:
Before you start taking photos of your subject, take a few test shots to make sure your camera is focus and exposure.
5. Use A Low ISO:
A low ISO will help you avoid noise in your photos.
6. Use A Fast Shutter Speed:
A fast shutter speed will help you freeze motion and avoid blur.
7. Use A Small Aperture:
A small aperture will help you create a shallow depth of field, which can be used to create interesting photos.
8. Use Natural Light:
Natural light will give your photos a more natural look.
9. Shoot In RAW:
Shooting in RAW will give you more control over your photos when you’re editing them.
10. Take Your Time:
Don’t rush your photos. Taking your time will help you get the best results.
Photography Essentials Kits For Beginners
Assuming you want a list of photography essentials for beginners:
1. A good quality digital single-lens reflex (DSLR) camera body. This is the foundation of any great photography kit, and will allow you to change lenses to suit your needs.
2. A few different DSLR lenses. A versatile kit might include a standard zoom lens (24-70mm), a telephoto zoom lens (70-200mm), and a prime lens (50mm or 35mm).
3. A tripod. This is an essential tool for anyone serious about photography, and will help you get sharp, well-composed shots in low light or when using long exposures.
4. A flashgun. An external flash unit will allow you to add fill light or create interesting lighting effects, and is a must-have for any budding portrait photographer.
5. A camera bag. This is essential for carrying and protecting your valuable gear, and there are many different styles and sizes to choose from to suit your needs.
6. Other accessories. These might include items like extra batteries, memory cards, a remote shutter release, filters, and software packages like Adobe Lightroom or Photoshop.
What are the important things to remember when using a camera?
The important things to remember when using a camera are:
- Always use a tripod to avoid blurred images.
- Use the timer or remote shutter release to avoid shake.
- Set the ISO speed according to the lighting conditions.
- Shoot in RAW format to get the best image quality.
- Use automatic bracketing to ensure you get the perfect exposure.
- Learn how to use all the features and functions of your camera.
- Experiment with different settings and techniques to get the best results.
- Have fun and enjoy taking photos!
What does a beginner photographer make?
There’s no one-size-fits-all answer to this question, as the amount of money a beginner photographer makes can vary greatly depending on their level of experience, the type of photography they specialize in, and the number of clients they work with.
However, many beginner photographers report earning an average of $50-$100 per hour for their services.
So, if you’re just starting out in photography, expect to make around $500-$1,000 per week (or $2,000-$4,000 per month) from your photography business.
Of course, as you gain more experience and start working with more high-paying clients, your earnings will increase accordingly.
Camera types for beginners
There are many different types of cameras available on the market today, and it can be confusing for a beginner to know which one to choose.
Here is a quick guide to the different types of cameras available, to help you make an informed decision about which one is right for you.
Compact Cameras:
Compact cameras are the most popular type of camera, and are perfect for beginners.
They are small and lightweight, making them easy to carry around, and they usually have simple controls that are easy to learn.
Compact cameras typically have a fixed lens, which means that you cannot change the focal length or zoom in or out.
DSLR Cameras:
DSLR cameras are the next step up from compact cameras, and are popular with Serious amateur photographers and professionals.
DSLR cameras have interchangeable lenses, so you can choose the right lens for the type of photography you want to do.
DSLR cameras also have more advanced features than compact cameras, such as better image quality and manual controls.
Mirrorless Cameras:
Mirrorless cameras are a newer type of camera that are becoming increasingly popular.
Mirrorless cameras have many of the same features as DSLR cameras, but they are smaller and lighter, as they do not have a reflex mirror.
This makes them more portable, and they are also easier to use for beginners.
Bridge Cameras:
Bridge cameras are a cross between compact and DSLR cameras, and offer the best of both worlds.
They usually have a fixed lens, like a compact camera, but also have some of the advanced features of a DSLR, such as manual controls and better image quality.
Bridge cameras can be a great choice for beginners who want to upgrade from a compact camera but are not ready for a DSLR just yet.
Action Cameras:
Action cameras are designed for people who want to take photos or videos while participating in activities such as sports, extreme sports, or other adventures.
Action cameras are small and compact, and often come with mounts so you can attach them to your body or equipment.
They usually have wide-angle lenses to capture as much of the action as possible, and some models also have features such as waterproofing and image stabilization.
Point-and-Shoot Cameras:
Point-and-shoot cameras are the simplest type of camera, and are often used by people who just want to point and shoot without worrying about any complex settings.
Point-and-shoot cameras usually have a fixed lens and simple controls, making them easy to use.
However, they often have fewer features than other types of cameras, such as manual controls and the ability to change lenses.
Choosing the right camera for you will depend on your budget, your level of experience, and what type of photography you want to do.
If you are a beginner, a compact camera or bridge camera may be the best choice for you.
If you are more experienced, or if you want to do more advanced photography, a DSLR or mirrorless camera may be a better option.
And if you want to take photos or videos while participating in activities such as sports, an action camera may be the best choice.
Whatever type of camera you choose, make sure that it meets your needs and that you are comfortable using it before making a purchase.
FAQs About getting started with photography
1. What Is A Beginner Photographer Called?
A beginner photographer can be called many things, but some common terms are amateur, hobbyist, or novice.
2. What Type Of Camera Should I Buy?
The best camera to buy is the one that fits your budget and meets your needs.
If you are just starting out, a point-and-shoot camera may be all you need.
As you become more experienced, you may want to consider an advanced point-and-shoot or a digital single-lens reflex (DSLR) camera.
3. How Much Does A Decent Camera Cost?
There is no definitive answer to this question since there are many factors to consider, such as the type of camera, brand, features, etc.
However, you can expect to spend anywhere from $200 to $2000 or more on a decent camera.
4. What Is The Difference Between An Amateur And A Professional Photographer?
The biggest difference between an amateur and a professional photographer is experience.
Professional photographers have spent years honing their craft and developing their skills, while amateurs are just starting out.
Additionally, professional photographers typically earn a living from photography, while amateurs do not.
5. What Should Every New Photographer Learn?
There are a few basics that every new photographer should learn in order to be successful.
First and foremost, it is important to understand the different types of equipment available and how to use it properly.
Next, one must develop a good eye for composition and framing.
Finally, it is also beneficial to understand post-processing techniques in order to improve the quality of one’s images.
By mastering these basic concepts, any new photographer can set themselves up for success.
6. Is Photography Easy To Learn?
No, photography is not easy to learn, but it is definitely worth the effort.
There is a lot of technical knowledge and skill required to produce great photographs, but with practice and perseverance anyone can improve their photography skills.
If you’re willing to put in the time and effort, there are plenty of resources available to help you learn photography.
Just remember, practice makes perfect!
7. What Qualifications Do You Need To Become A Photographer?
In general, most photographers will need to have at least a basic understanding of photography equipment and techniques, as well as an eye for composition and detail.
Some photographers may also choose to study photography formally, although this is not always necessary.
Ultimately, the best way to improve your skills as a photographer is to practice regularly and experiment with different techniques.
8. Can I Teach Myself Photography?
Yes, you can teach yourself photography. However, it will take time, effort and practice to master the art of photography.
There are many resources available online and in libraries that can help you learn photography.
You may also want to consider taking a class or workshop to get started. With patience and practice, you can become a great photographer!
Conclusion
Overall, getting started in photography can be easy or difficult, depending on your level of interest and commitment.
If you are serious about becoming a photographer, it is important to invest time in learning the basics and practicing regularly.
However, even if you only want to take occasional photos, there are still some basic concepts that you should understand.
By familiarizing yourself with the different types of equipment available and taking the time to practice, you can quickly improve your photography skills and begin taking better pictures.